What Is the Wet-on-Wet Oil Painting Technique?
The wet-on-wet technique, also known as alla prima, is a method of oil painting where fresh paint is applied directly onto still-wet paint rather than waiting for each layer to dry before adding the next. This approach allows colours to blend naturally on the canvas, producing soft transitions, atmospheric effects, and a sense of spontaneity that is difficult to achieve with traditional layered painting methods.
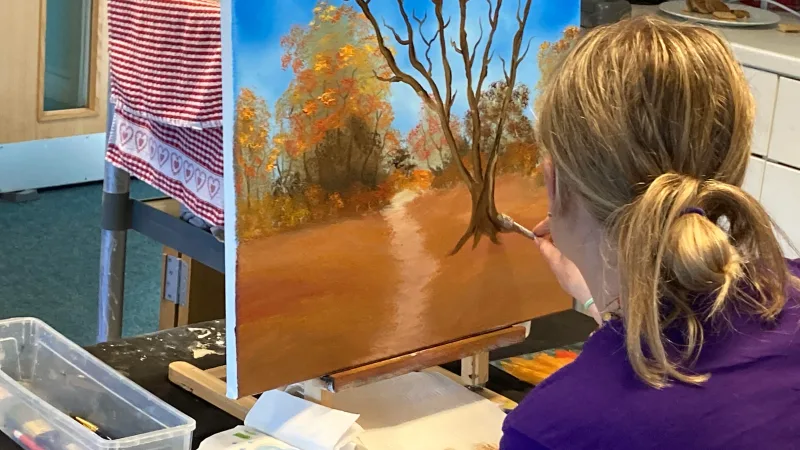
If you have ever watched Bob Ross on The Joy of Painting, you have seen wet-on-wet in action. Those dreamy skies, misty mountains, and gentle reflections on water were all created by working paint into paint while everything remained fresh and malleable. It is the technique that makes it possible to complete a full landscape painting in under an hour — and it is the foundation of everything I teach in my painting classes here in Kent.
The Origins: Bill Alexander and the Magic of Wet-on-Wet
Bill Alexander was a German-born painter who emigrated to the United States and became the first television art instructor to bring the wet-on-wet method to a wide audience. His show, The Magic of Oil Painting, ran throughout the 1970s and early 1980s and demonstrated that ordinary people could produce beautiful oil paintings without years of formal training.
Alexander did not invent the technique — artists had been painting wet-on-wet for centuries — but he was the first to package it into a structured, repeatable system for beginners. He developed specially formulated paints and tools, including the iconic two-inch brush, that made the method accessible to everyone.
How Bob Ross Took It Further
Bob Ross studied under Bill Alexander before developing his own refined version of the technique. Ross simplified the process even further, created his own line of paints and brushes, and launched The Joy of Painting in 1983. Over 31 series and more than 400 episodes, Ross taught millions of viewers that they could paint — and that the process should be joyful, not stressful. His insistence that there are no mistakes, only happy accidents, combined with the forgiving nature of wet-on-wet, removed the fear that stops so many people from ever picking up a brush.
How Wet-on-Wet Differs from Traditional Oil Painting
In traditional oil painting, artists typically work in layers. They might start with a thin underpainting, allow it to dry completely over several days, then add successive layers of thicker paint on top. This process can take weeks or even months to complete a single painting.
Wet-on-wet turns this approach on its head:
- Speed: An entire painting is completed in a single session, usually within one to two hours.
- Blending: Because every layer is still wet, colours merge and blend on the canvas, creating naturally soft edges and gradients.
- Base coat: The canvas is pre-coated with a thin layer of Liquid White (or Liquid Clear), providing a slippery surface that allows fresh paint to be moved and shaped easily.
- Thick over thin: Firm, thick paint is applied over the thin base coat. The thicker paint sits on top rather than sinking in, allowing sharp details like mountain ridges and tree trunks.
- No drying time between steps: You move from sky to mountains to trees to foreground without stopping. Each element is painted while everything around it is still wet.
Materials You Will Need
One of the great things about the Bob Ross method is that the materials list is straightforward. Here is what you need to get started:
Brushes and Tools
- 2-inch background brush: Your workhorse for skies, water, and large areas of colour.
- 1-inch landscape brush: Used for smaller areas, bushes, and building structures.
- Fan brush: Essential for painting trees, grasses, and water effects.
- Palette knife: Used for mixing paint, creating mountains, and adding fine details like fences and paths.
- Liner brush (script liner): A thin brush for painting tree trunks, branches, and other fine line work.
Paints and Mediums
- Liquid White: The base coat that makes wet-on-wet possible. It keeps the canvas slippery and receptive throughout your painting session.
- Titanium White: Used for clouds, highlights, and snow.
- The Bob Ross colour palette: Phthalo Blue, Prussian Blue, Alizarin Crimson, Van Dyke Brown, Sap Green, Cadmium Yellow, Yellow Ochre, Bright Red, Dark Sienna, Midnight Black, and Indian Yellow cover virtually any landscape scenario.
- Odourless thinner: For cleaning brushes between colours.
A Step-by-Step Overview of the Technique
While every painting is different, the general wet-on-wet process follows a consistent sequence that I teach in all my classes:
1. Prepare the Canvas
Apply a thin, even coat of Liquid White across your entire canvas using a large brush. The surface should be wet but not dripping — think of it as a thin, slippery film. This is the foundation that makes everything else possible.
2. Paint the Sky
Starting at the top of the canvas, use your two-inch brush to lay in the sky colours. Work from the top downwards, using long horizontal strokes and blending as you go. Because you are working into the wet Liquid White, the colours will soften and merge beautifully.
3. Add Mountains and Background Elements
Load your palette knife with a roll of paint and press it against the canvas to create mountain shapes. Use the knife to scrape and blend, creating ridges, shadows, and highlights. The wet base allows you to push and pull the paint until the shape looks right.
4. Create Midground and Foreground
Switch to your fan brush and one-inch brush to add trees, bushes, and foreground elements. Layer from back to front, working darker to lighter to create depth.
5. Add Details and Highlights
Use the liner brush for tree trunks and branches, the palette knife for paths and structures, and a clean fan brush for final highlights on trees and grasses. These finishing touches bring the painting to life.
Why Wet-on-Wet Is Perfect for Beginners
Having taught hundreds of students over the years, I can tell you with absolute confidence that wet-on-wet is the most accessible way to start oil painting. Here is why:
- Immediate results: You walk away with a finished painting after just one session. There is no waiting, no coming back next week to add another layer.
- Forgiving nature: Made a mistake? Simply scrape the paint off with your palette knife and try again. The wet surface means nothing is permanent until the paint dries.
- Built-in blending: The wet base does much of the blending work for you. Even a complete beginner can create smooth skies and water on their very first attempt.
- Structured process: The step-by-step sequence gives you a clear roadmap, removing the paralysis of staring at a blank canvas.
"I had never held a paintbrush before Mark's class, and I went home with a painting I was genuinely proud of. The wet-on-wet technique made it feel achievable from the very first brushstroke." — Sarah, Whitstable
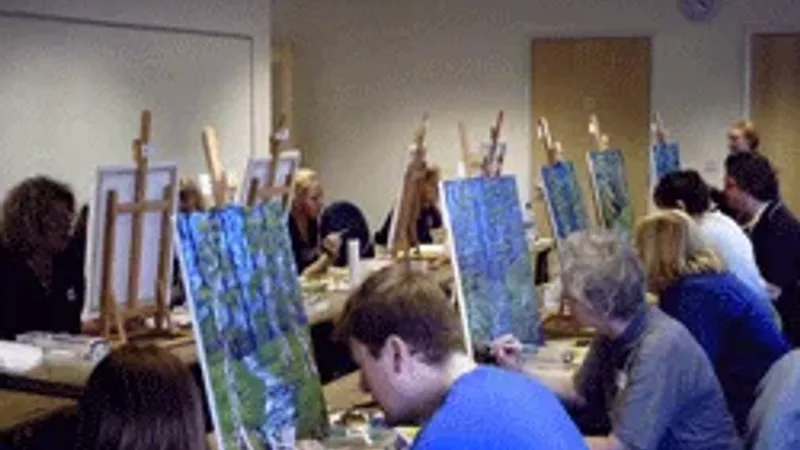
If you are curious about trying this technique for yourself, I would love to welcome you to one of my painting classes. No experience is needed, and all materials are provided. You will leave with a completed painting and a new skill you can enjoy for the rest of your life.
Tags: wet-on-wetalla-primabeginneroil paintingBob Ross method